
M4VGear for Mac is the smart video converter which supports converting iTunes M4V movies, TV Shows, music videos and iTunes Extras on Mac. It can convert iTunes Purchased & Rental M4V videos to unprotected files with perfect output quality. What's more, this M4V Converter can also retain all subtitles and audio tracks.
If you also want to download movies and series from Apple Tv, Netflix, Amazon, and more, try SameMovie All-In-One Video Downloader
Put simply, M4VGear is a shareware, and the trial version has the limitation that you can only convert 1 minute for each video. After you purchase our product, you will receive one email with your Registration Email and Registration key which will unlock the trial version limitation.
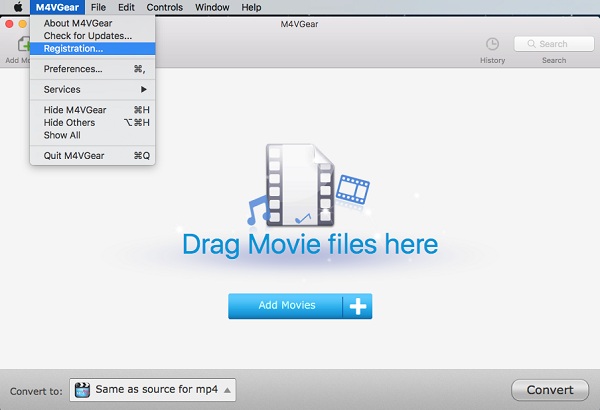
Step 1. Run M4VGear. First you should click the M4VGear menu, and then select the "Registration..." option in the drop-down list to register M4VGear.
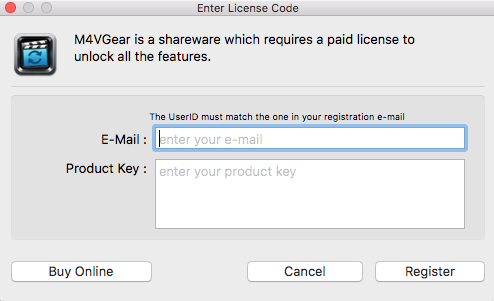
Step 2. Please fill the blanks with Email address and Registration Code. You can use "Command+C" to copy and "Command+V" to paste in the window.
Step 3. After you finished the Registration, the limitation of the trial version will be removed.
Note: The registration code is case sensitive. Please do not insert any blank before or after the registration information.
Your computer should be connected with the Internet.
If you are old user of M4VGear who purchased M4VGear before September 30, 2016, you still need to register our program with your user name and registration code.
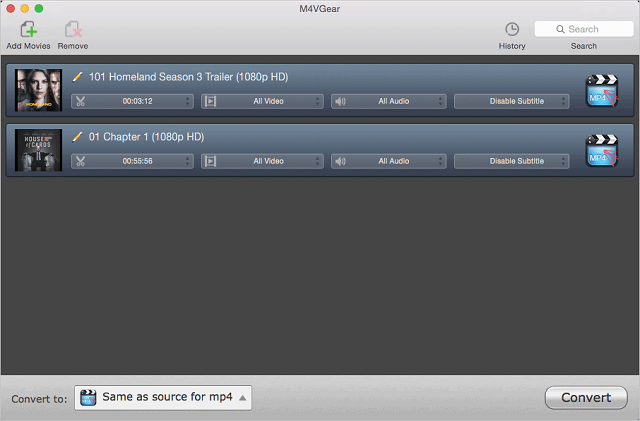
Step 1Import Video Files
Click the Add Movies button in the middle or on the upper left, and then locate and select the files you want to add. Click the Add Movies button, then you can see all the files you chose are shown in the file list. Here you can click the pen icon to change the name of your videos if required.
Please note that only iTunes protected M4V videos can be added successfully.
If you can't easily find the videos for adding, please try to use the search function on the lower left corner of adding window.
You can also drag & drop *.m4v files to the main interface of M4VGear directly from your local computer or external hard disk connected with your computer.
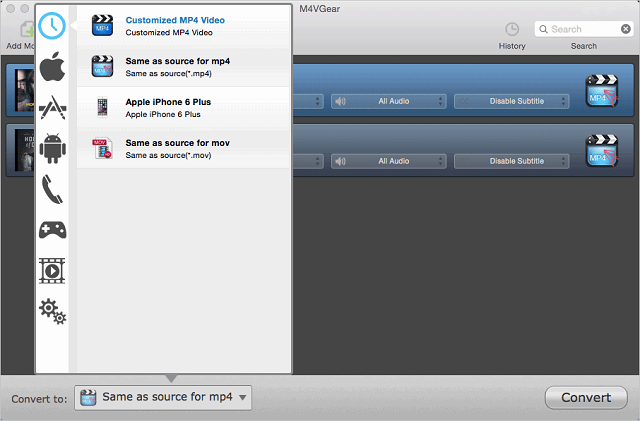
Step 2 Output Setting
Go to the lower left of M4VGear and choose output format for your videos in the drop-down list. You can convert the iTunes M4V videos to various plain formats like MP4, MOV, WMV and AVI, etc. Here we highly recommend you to choose "Same as source for mp4" or "Same as source for mov" as output format, which could losslessly convert iTunes videos at 20X faster speed, and keep all audio tracks and subtitles.
If you don't want to convert the whole videos, you can also clip the video before your conversion. After loading the videos to M4VGear, you will find the video clipping option under every video. Click the pen icon and then choose "Trim Video" option. You will be allowed to adjust the Start and End time to convert the clips which you want. Finally, click OK to apply
And you can also click the Open button on the upper right to customize the output directory.
Step 3.Customize Audio tracks and Subtitles and Output Path.
Click the Audio or Subtitle Options in the bottom of the loaded videos, and then choose the Audio tracks or Subtitles you want to keep in the drop-down list box. Then the file will show up the audio tracks or subtitles information you selected.
If you want to reset the output path, just click M4VGear > Preferences on the upper left of your Mac and then change the output path in the popup window.
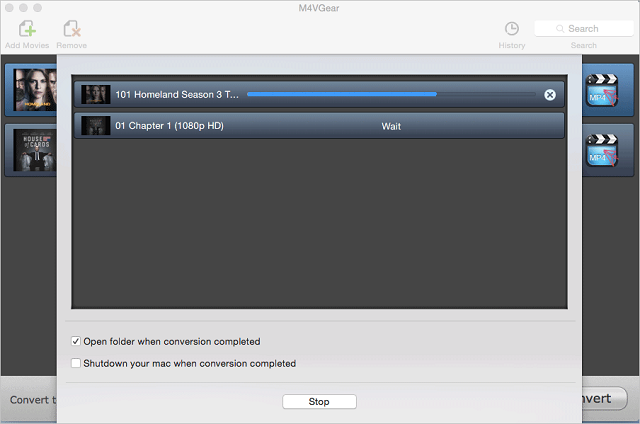
Step 4. Start Conversion.
After adding the video files and customizing output path, just click the Convert button to start conversion. At the same time, iTunes will be launched again if it has been closed after started together with the program.
When the conversion is completed, the history records will be saved automatically. Click the History button to show up the records.


